noise colors
White Noise Machine Placement for Clear Audio
White noise machine placement matters when you play Dream-Self audio. Learn where to put it, how loud to set it, and how to test the room tonight.
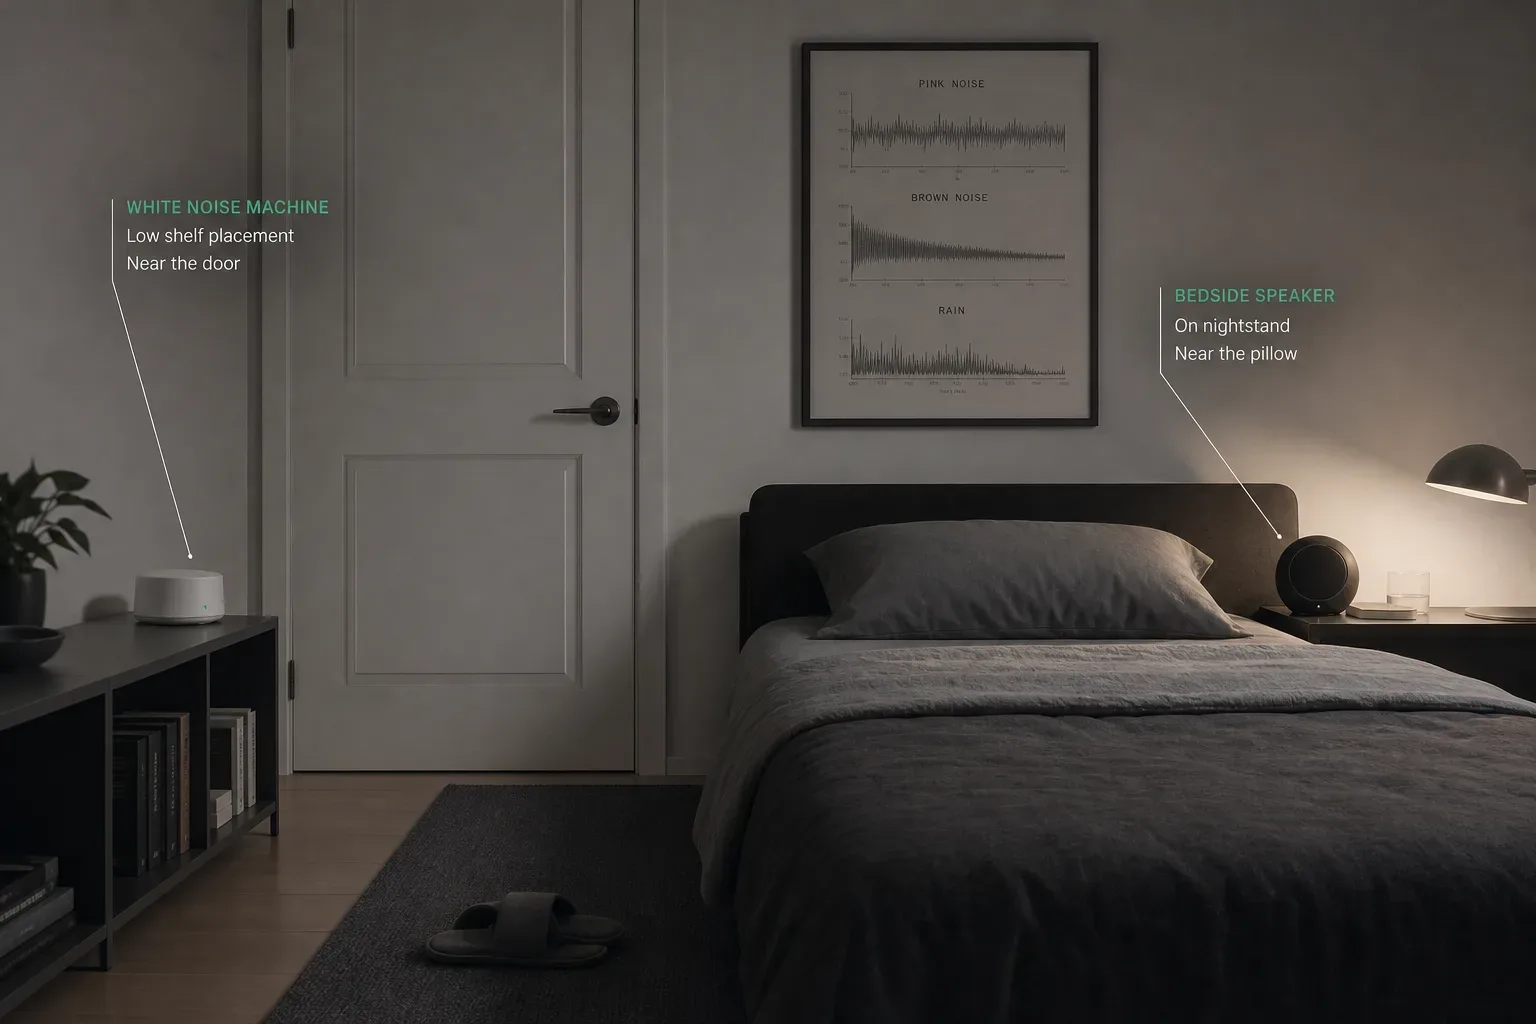
White noise machine placement is the difference between masking the room and masking the voice you came to hear. Put the noise near the disturbance, keep Dream-Self audio closer to your ear, and set the volume just high enough to soften interruptions, not to dominate the room.
Where should a white noise machine go for clear spoken audio?
The machine should sit between the unwanted sound and your bed, while the spoken audio source stays closer to you.
White noise works by raising the acoustic floor, so sudden sounds stand out less. If the main disturbance comes through a bedroom door, place the machine within about 30 to 90 cm of that door. If traffic enters through a window, put the machine nearer the window, not on the pillow side of the bed. The placement goal is plain: intercept the disturbance before it reaches your listening point.
The World Health Organization has long treated nighttime noise as a sleep concern; its 2009 night noise guidelines identify 40 dB Lnight outside as a health-based target for long-term exposure. Indoors, many sleep researchers discuss lower levels, often around the 30 dBA range for quiet bedrooms. You do not need a lab meter to benefit from that number. You need a simple hierarchy: outside noise first, masking sound second, spoken audio third, your ear last.
When the noise source sits beside the speech source, both signals arrive from the same direction. Your ear has less spatial contrast to work with. When you separate them by 1 to 2 meters, the brain can more easily treat one as background and one as message. The voice should feel placed, not buried.
A useful starting pattern is this:
| Disturbance | White noise placement | Dream-Self audio placement |
|---|---|---|
| Hallway voices | Near the bedroom door | Bedside table or pillow speaker |
| Traffic | Near the window | Bedside table away from window |
| Shared wall | Along that wall, below ear height | Opposite side of bed if possible |
| HVAC rumble | Between vent and bed | Close to pillow, low volume |
Sound prepares the room; the voice should still have a clean path.
How far should the machine be from your bed and speaker?
Start with the white noise machine 1 to 2 meters from your head and at least 1 meter from the spoken audio source.
Distance gives you control without asking for more volume. A machine 20 cm from the pillow often feels louder than it measures, especially with small speakers that emphasize high frequencies. A machine across the room can mask the same door gap more gently because the sound spreads before it reaches you. In practice, 1 to 2 meters from the pillow is enough for most bedrooms under 15 square meters.
Keep the Dream-Self audio source closer than the masking source. If your spoken audio plays from a phone, a small speaker, or a pillow speaker, place it 30 to 80 cm from your listening ear. Spoken words depend on consonants, and consonants live partly in higher frequencies around 2 to 6 kHz. White noise contains those frequencies too, so a close white-noise speaker can blur speech fast.
A 2017 review in Sleep Medicine Reviews found that environmental noise can disturb sleep through brief arousals, even when people do not fully wake. The point of masking is to reduce those peaks, not to make the room acoustically dense. If the whole room feels filled with hiss, the machine is probably too close, too bright, or too loud.
Try height as well as distance. Place the white noise below pillow height when possible, such as on a low shelf or chair. Put the voice source nearer ear height, but not pressed against the ear. Your nervous system tends to settle when the room is steady and the instruction is easy to hear.
What volume keeps white noise useful without covering the voice?
Use the lowest volume that masks the disturbance while leaving speech intelligible at a relaxed attention level.
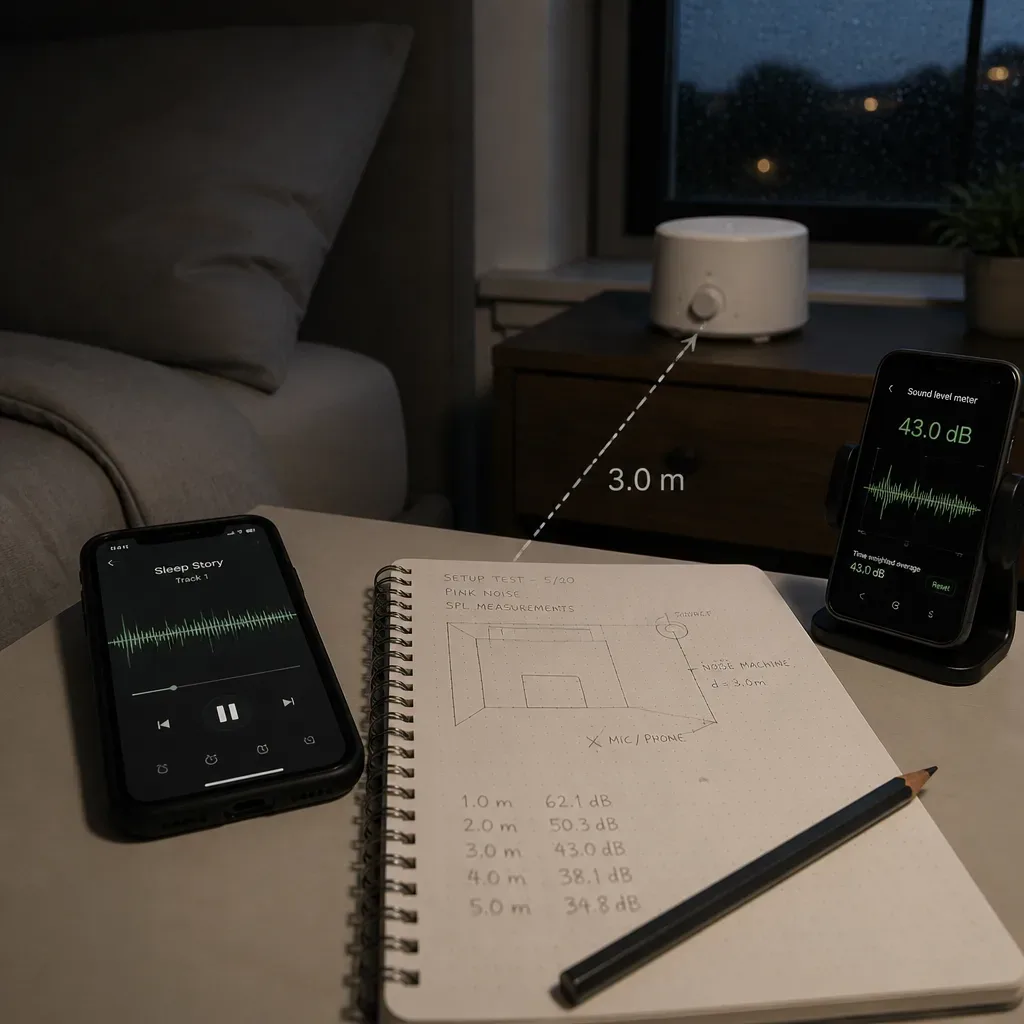
For adults, many home setups land around 40 to 50 dBA at the pillow. That is below normal conversation, which is often cited around 60 dBA at 1 meter. You can measure roughly with a phone sound meter app, but phone microphones vary. Treat the number as a guide, not a medical-grade reading.
The National Institute for Occupational Safety and Health uses 85 dBA over 8 hours as a recommended exposure limit for workplaces, and that is not a sleep target. Night practice should be much quieter. For children, keep the device farther away and lower. A 2014 study in Pediatrics measured infant sleep machines and found that some could exceed safe nursery levels at close range, which is why distance and conservative settings matter.
Speech clarity is the real test. Play a 20 to 30 second section of spoken audio at the level you plan to use. Then raise the white noise until the room softens. If you start missing endings of words, lower the noise or move it away. If the voice becomes something you have to chase, the setup has failed its main job.
You can compare textures before committing. Press play on the White noise generator + guide, then switch to softer alternatives if the hiss cuts into speech. Some listeners find pink or brown noise easier under a spoken track because there is less sharpness in the upper band.
How do you test the placement in 12 minutes tonight?
Run a short placement test by moving the noise source first, then changing volume only after distance and direction are set.
You do not need perfect acoustics. You need repeatable listening. Use the same spoken passage each time, ideally 30 seconds with normal pacing. Keep the spoken audio level fixed. Then make one change at a time to the white noise machine. This is the small discipline that prevents the common mistake of raising every device until nothing is clear.
A 2021 review in Journal of Clinical Sleep Medicine noted that evidence for continuous noise improving sleep is mixed, partly because studies use different sounds, volumes, and populations. That mixed evidence fits what rest teachers see in rooms: some nervous systems settle with a steady hum, and others prefer less masking. Yours gets a vote.
Use this 12-minute check:
- Minute 0 to 1: Stand at the bed and name the loudest disturbance.
- Minute 1 to 3: Put the white noise machine near that source, not near your head.
- Minute 3 to 5: Play your spoken audio at a comfortable level.
- Minute 5 to 7: Raise white noise until the disturbance fades by about half.
- Minute 7 to 9: Move the machine 30 cm left, right, forward, or back.
- Minute 9 to 11: Choose the position where speech stays clearest.
- Minute 11 to 12: Mark the spot with a cable path, shelf position, or bedside note.
The best setup is the one you can repeat when you are tired.
What room setups need a different placement strategy?
Different rooms need different placement because the strongest reflection or leak point changes the way masking reaches your ear.
A small bedroom behaves differently from a long room with hard floors. Bare walls reflect high frequencies, so white noise can become sharper after bouncing. Curtains, rugs, and bedding absorb some of that brightness. Even a folded blanket at a door gap can reduce the amount of masking volume you need. In acoustic work, reducing the source problem by a few decibels often helps more than adding another sound.
Apartment bedrooms often have two main leak paths: doors and shared walls. Door gaps favor mid and high frequencies, such as voices and footsteps. Shared walls may carry lower thuds. For voices, place the machine near the door and angle it toward the room, not into the hallway. For thuds, try brown noise or a lower, fuller setting. The Binaural beats generator + guide is different: it uses paired tones through headphones, so it is not a room-masking tool.
Here are practical adjustments:
- Hard floors: add a rug or place the machine lower to reduce bright reflections.
- Door gap noise: put the machine 30 to 60 cm inside the door.
- Window traffic: place the machine on the window side and use curtains.
- Shared wall thumps: use a lower noise color and keep the voice source close.
- Partner in bed: aim the spoken audio toward your side at a very low level.
If you use frequency-based sound ritual before bed, keep it separate from masking. The Solfeggio frequencies guide explains the tradition and the evidence plainly. A single tone can be an attention anchor, but it will not block a delivery truck outside the window.
How should white noise work with the AYA Method?
White noise should prepare the room for the AYA Method, not compete with the Dream-Self Moment.
The AYA Method is a daily audio manifestation practice. Each day you listen to a short personalized recording, your Dream-Self Moment, narrated from the version of you who has already manifested the life you intend. Listening is the practice. Repetition is the work. The audio is the method.
That definition matters for placement. If the method is audio, speech intelligibility is not optional. The white noise machine is a support tool, like dim light or a closed door. It lowers the room’s interruptions so the spoken recording can remain central. If you cannot hear the nouns, verbs, and emotional tone of the recording, reduce the masking sound until the words return.
A practical sequence works well for many listeners. Start the white noise 5 minutes before the spoken practice, especially if your room has irregular sounds. Let the nervous system register the steady bed of sound. Then begin the Dream-Self Moment from a closer speaker. Keep the voice just above the noise, not dramatically louder. After the recording ends, you can either stop the voice and leave the white noise running, or fade both down.
Neville Goddard wrote about the drowsy state as a useful threshold for imaginal practice, and modern teachers such as Joe Dispenza also emphasize repetition and state. The evidence around manifestation claims is not the same as clinical sleep research, so keep the categories clean. What we can say plainly is that repeated audio cues are easier to use when the room is quiet enough to hear them.
What mistakes make white noise machine placement less effective?
The most common mistake is treating volume as the solution when placement has not been tested.
Turning the machine up can feel efficient for 10 seconds. Over a whole night, it can make the room tiring, especially if the speaker is close to your head. It can also train you to need more sound than the room actually requires. Move the source first. Raise volume second. Change sound color third.
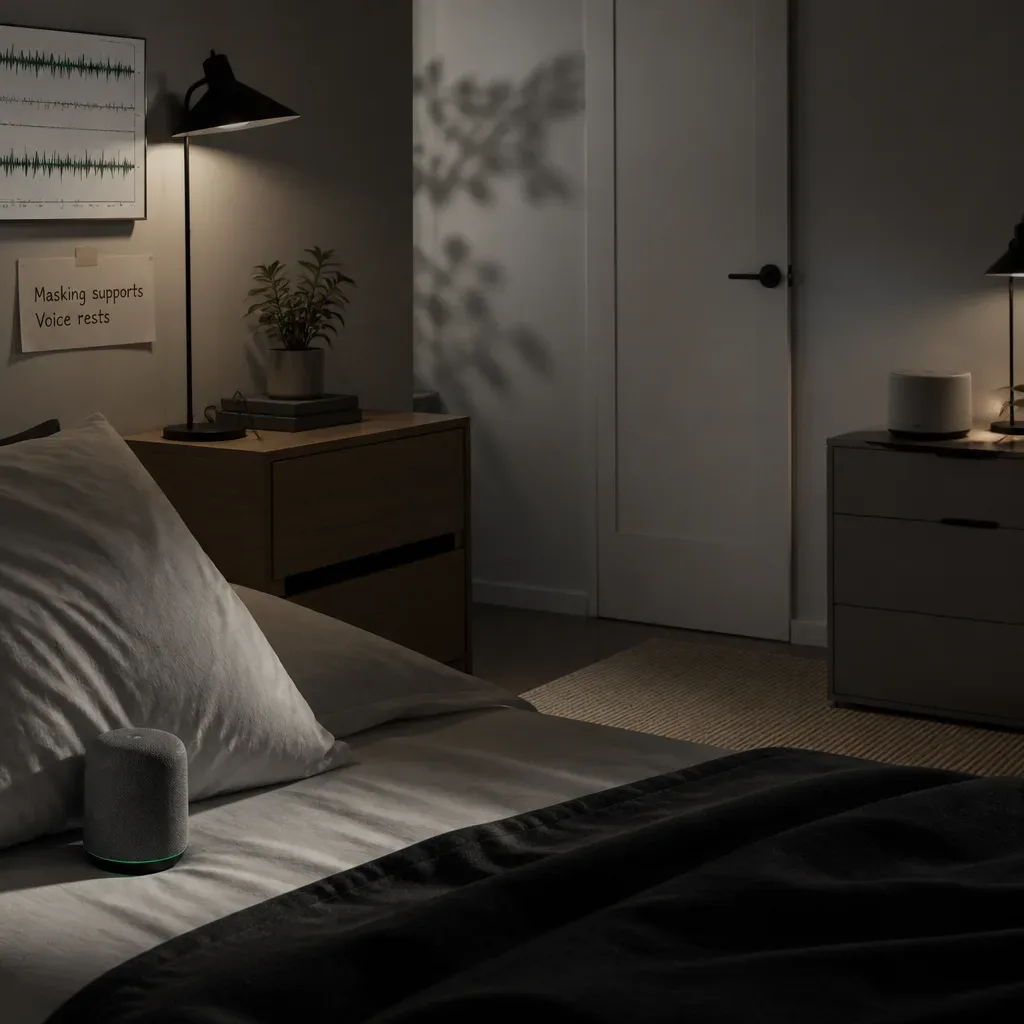
Another mistake is putting every audio source on the same bedside table. A phone playing speech, a white noise unit, and a charging cable all clustered within 20 cm create a small sound pile. The voice loses shape. Instead, split functions: masking toward the leak, speech toward the ear, chargers wherever they do not vibrate.
Consumer Reports and hearing-health organizations often remind listeners that distance reduces intensity quickly. In free-field acoustics, doubling distance can reduce level by about 6 dB, though real rooms vary because of reflections. That single number explains why moving a machine from 30 cm to 120 cm from your head can feel much calmer.
Watch for these signs:
- The voice sounds clear only when you strain.
- The noise feels sharper after 10 minutes than it did at first.
- You wake with ear fatigue or irritation.
- Your partner hears the machine more than you do.
- The disturbance is still obvious, but the room is louder overall.
A steady hum should make the room less eventful, not more crowded.
When should you use another tool or ask a professional?
Use another tool when white noise adds strain, and ask a professional when sleep disruption or hearing symptoms persist.
White noise is a simple masking tool. It is not treatment for chronic insomnia, tinnitus, sleep apnea, anxiety, or hearing changes. If ringing, pulsing, ear pain, or persistent sleeplessness is part of the picture, speak with a qualified clinician. If snoring is loud with pauses in breathing, ask about sleep apnea screening. The American Academy of Sleep Medicine treats repeated breathing pauses as a medical issue, not a sound-setting problem.
For ordinary room noise, you can test alternatives. Pink noise has less high-frequency emphasis than white noise. Brown noise has still more low-frequency weight and often feels rounder. Some listeners prefer steady rain or fan recordings. The important measure is not the label. It is whether the sound masks interruptions while preserving the voice.
The White noise generator + guide can help you compare levels without buying another device. If tones help you settle before spoken practice, use the Solfeggio frequencies guide for context, and keep the claims in proportion. If you want headphone-based rhythmic tones, the Binaural beats generator + guide explains what the brain is constructing and where the evidence is mixed.
Your final setup should be boring in the best way: same position, same level, same clear voice. A practice kept gently for months outperforms any tone chosen perfectly once.
Put the room where the voice can find you.